Review Scrapper By Django
Review Scrapper project by Django
Hello everyone in this blog we learn how to make a full fledge python project "Review Scrapper by Django" in Pycharm .
We also use Django framework for doing some backend work.
0th Steps: Install Pycharm and create virtual environment by using Pycharm.
For installing kindly refer my Pycharm Guide blog. Here is the link
1st steps: Install Django in your virtual environment and Create new project.
Firstly activate your virtual environment in your Anaconda command prompt .By using command:
conda activate env_name
Navigate directory where you want to save your project.By using
cmd directory_name
Now install Django in your virtual environment :
pip install Django
We are now ready to create our first Django project :
django-admin startproject project_name
In single project contain different app. Ex store/login/update and many more.It is recommended to seperate different app.
For Creating New app:
python manage.py startapp app_name
Now We complete our Installation and Creating new project part. One last step for running our Django project .For this we use :
python manage.py runserver
After completing all these step you will see these much file are automatically created in your project except Procfile and requirements,txt these will be discuss later.
Here DjangoReview_scrapper is main project inside this ReviewScrapper is small app inside it.
2nd Step: Creating urls.py file and add ReviewScrapper(mini app) url in main project urls.py file.
Now Open DjangoReview_scrapper / urls.py file and add Reviewscrapper urls file:
But We don't have urls.py file .So, Now we create urls.py file inside ReviewScrapper app and add some urls of home, about page and scrap page.
scrap page where we see the output.
Now we add the configuration of our app in ReviewScrapper/apps.py :
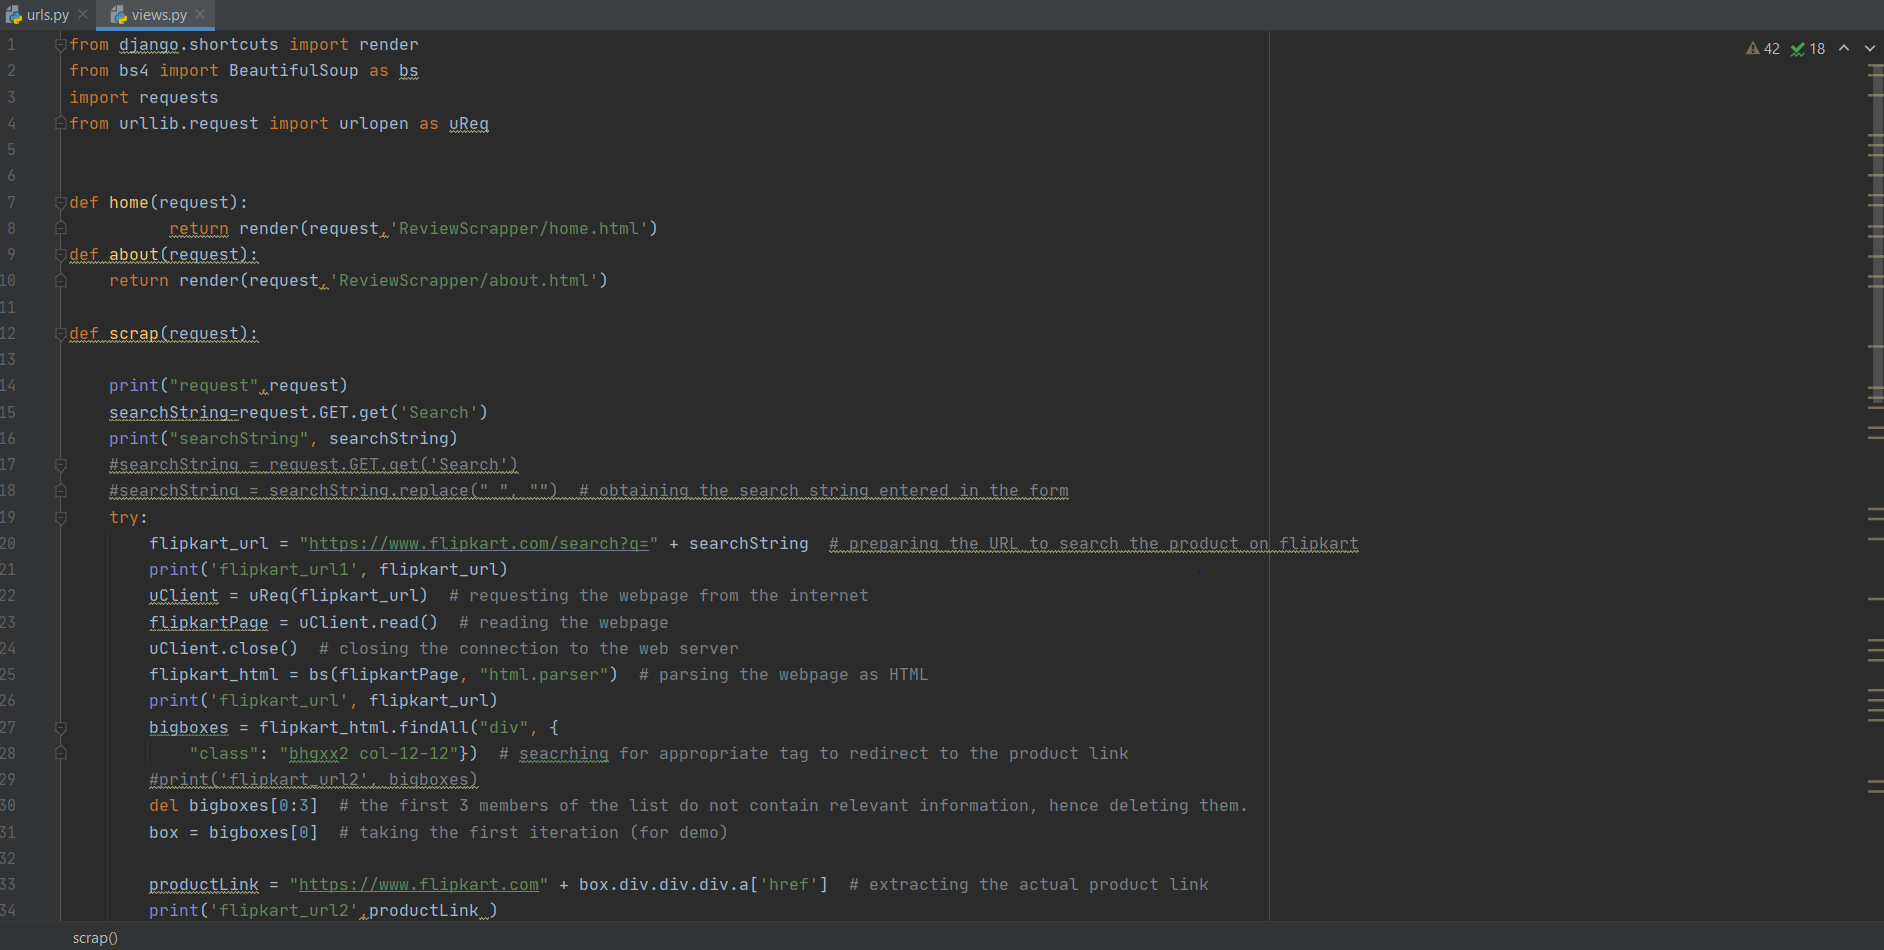
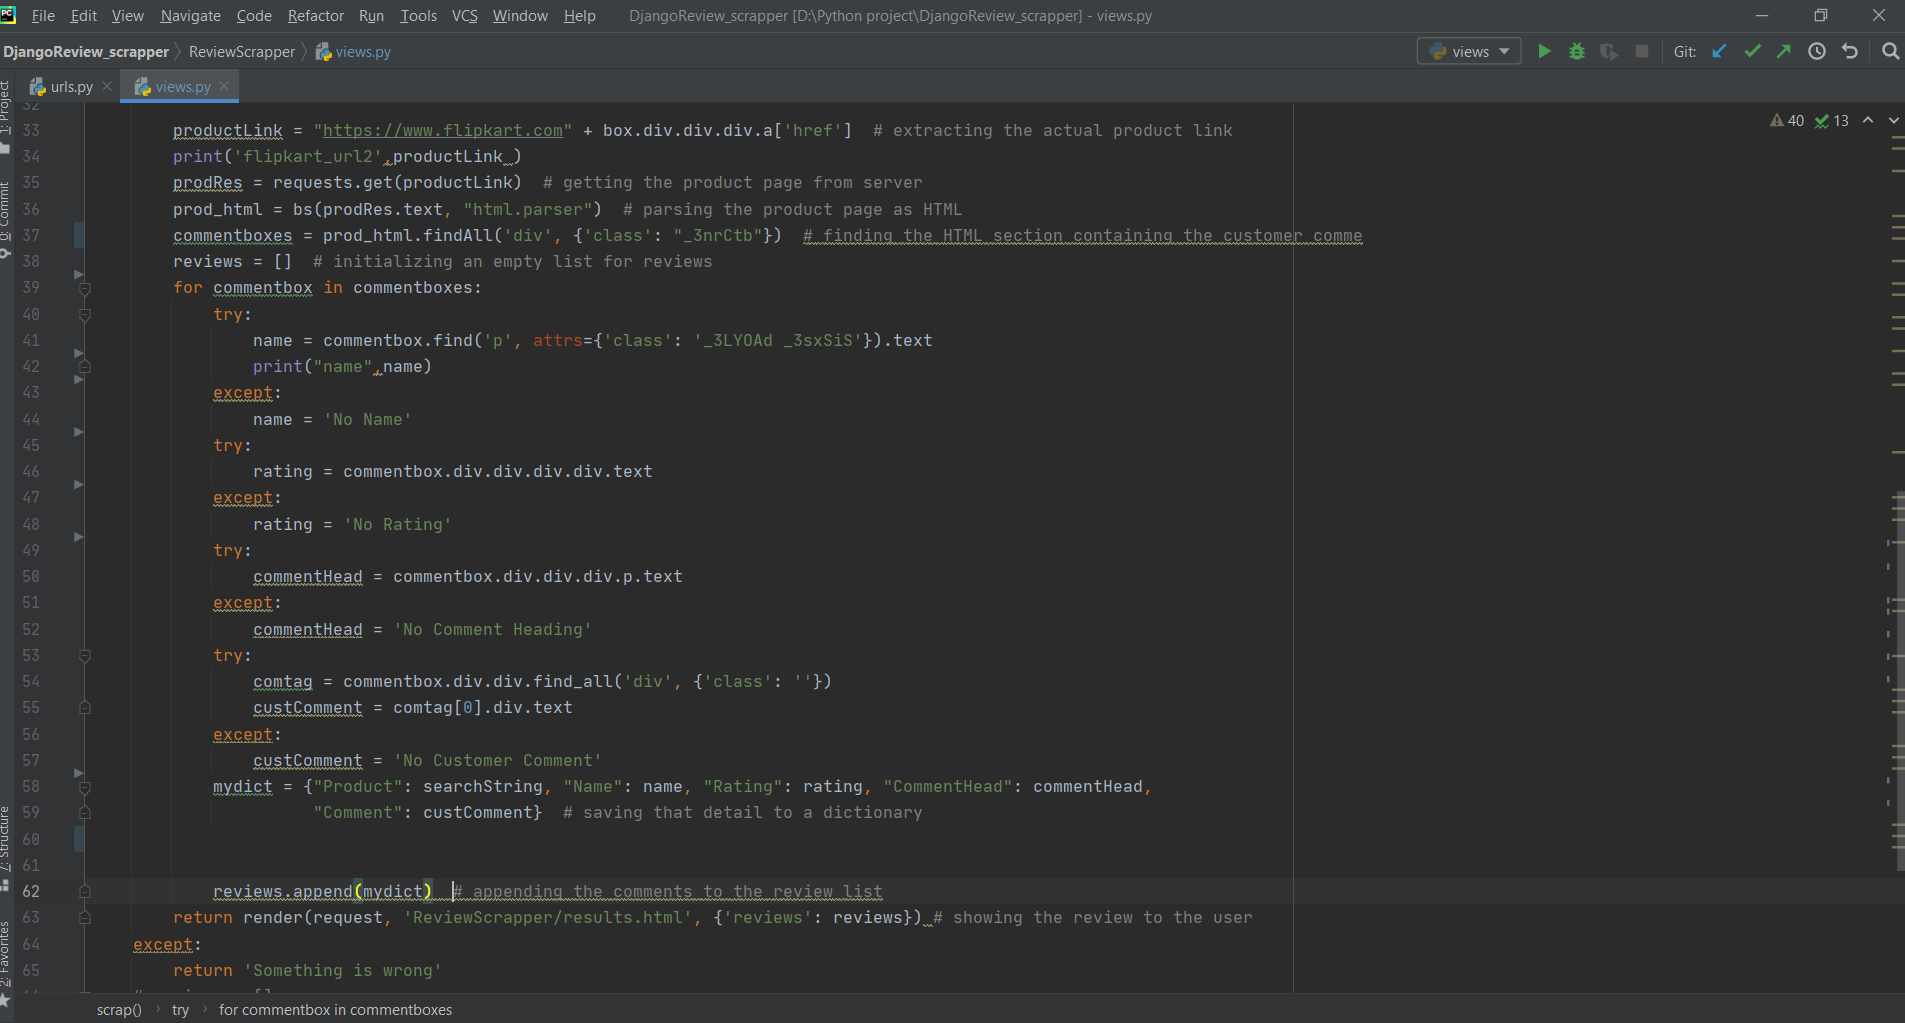
3rd Step: Coding part where we write some some to extract review from flipkart site.
In this part we us beautifulscoup library . So, For some basics of beautifulscoup library .Kindly refer its documantion by Clicking Here .
In Django We write all coding stuff in views.py file.
Code is not very much difficult you can easily understand it. After reading documentation of Beautifulscoup library.
All lines which is little bit tricky comment are also added on it .If you face any problem in this section kindly ping me on comment section and line number.
4th Step :Little bit Html and CSS templates to display our output.
For adding Html and CSS templates in our Django project. We use template inheritance concepts .
Template inheritance. The most powerful – and thus the most complex – part of Django's template engine is template inheritance. Template inheritance allows you to build a base “skeleton” template that contains all the common elements of your site and defines blocks that child templates can override.
For adding Html we make a directory name of templates/ReviewScrapper inside it we add base page, home page, about page and result page.
base page is our base template of all html pages :
Here we also use bootstrap . Basic bootstrap you can learn from its documentation.
Now, We make home page using HTML:
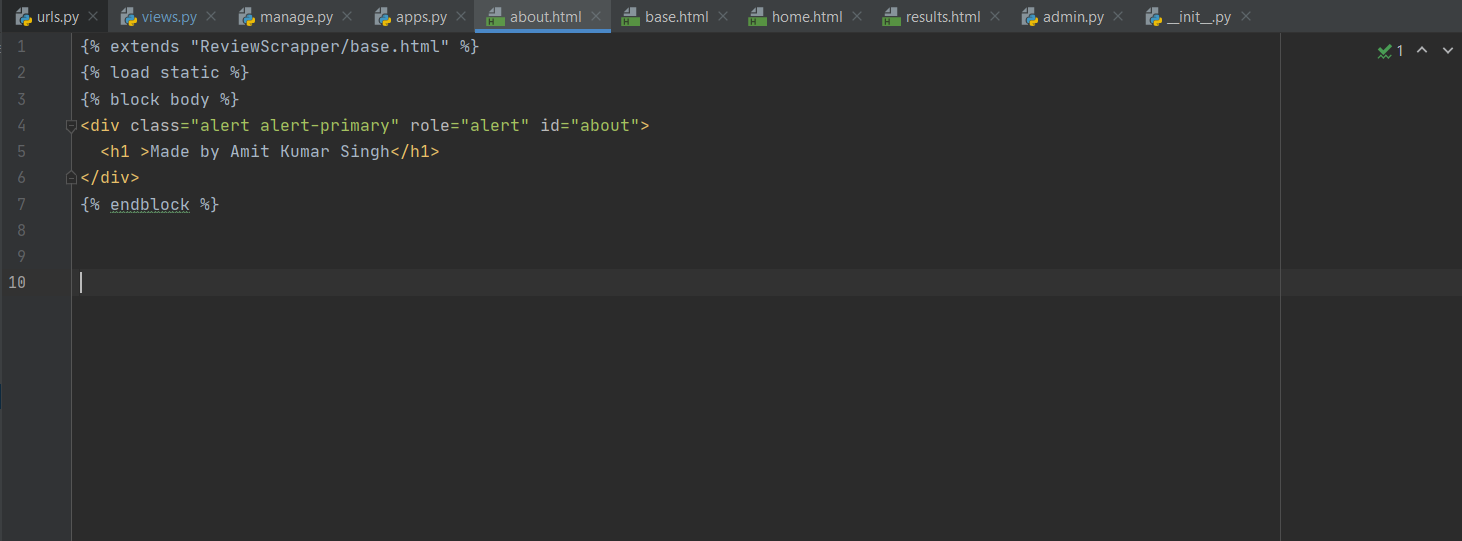
Now About page :
At last we add result page:
Now Only one thing is left only apply css on our HTML pages .For applying CSS same we use template inheritance and outside styling .When you see any HTML page closely you see that .At every page {% load static %} it load our CSS on every HTML page.
For CSS styling we make a directory inside ReviewScrapper app name as static.
File Structure : ReviewScrapper/static/ReviewScrapper/static.css
Heyy!! Now we are ready to launch our project .Are you excited !!
Output: For output run command " python manage.py runserver " .Now our project is running in our localhost " http://127.0.0.1:8000/"
Now You can search anything its your choice.
I think you learned something new in this blog .
I hope it helps you.
Thanks you.
Happy Learning!!!


Good one:) .Great!!!
ReplyDeleteInteresting !!!👌
ReplyDeleteAMAZING!!!
ReplyDeletehttps://amzn.to/35Vh2I8
ReplyDelete